Which should I use?
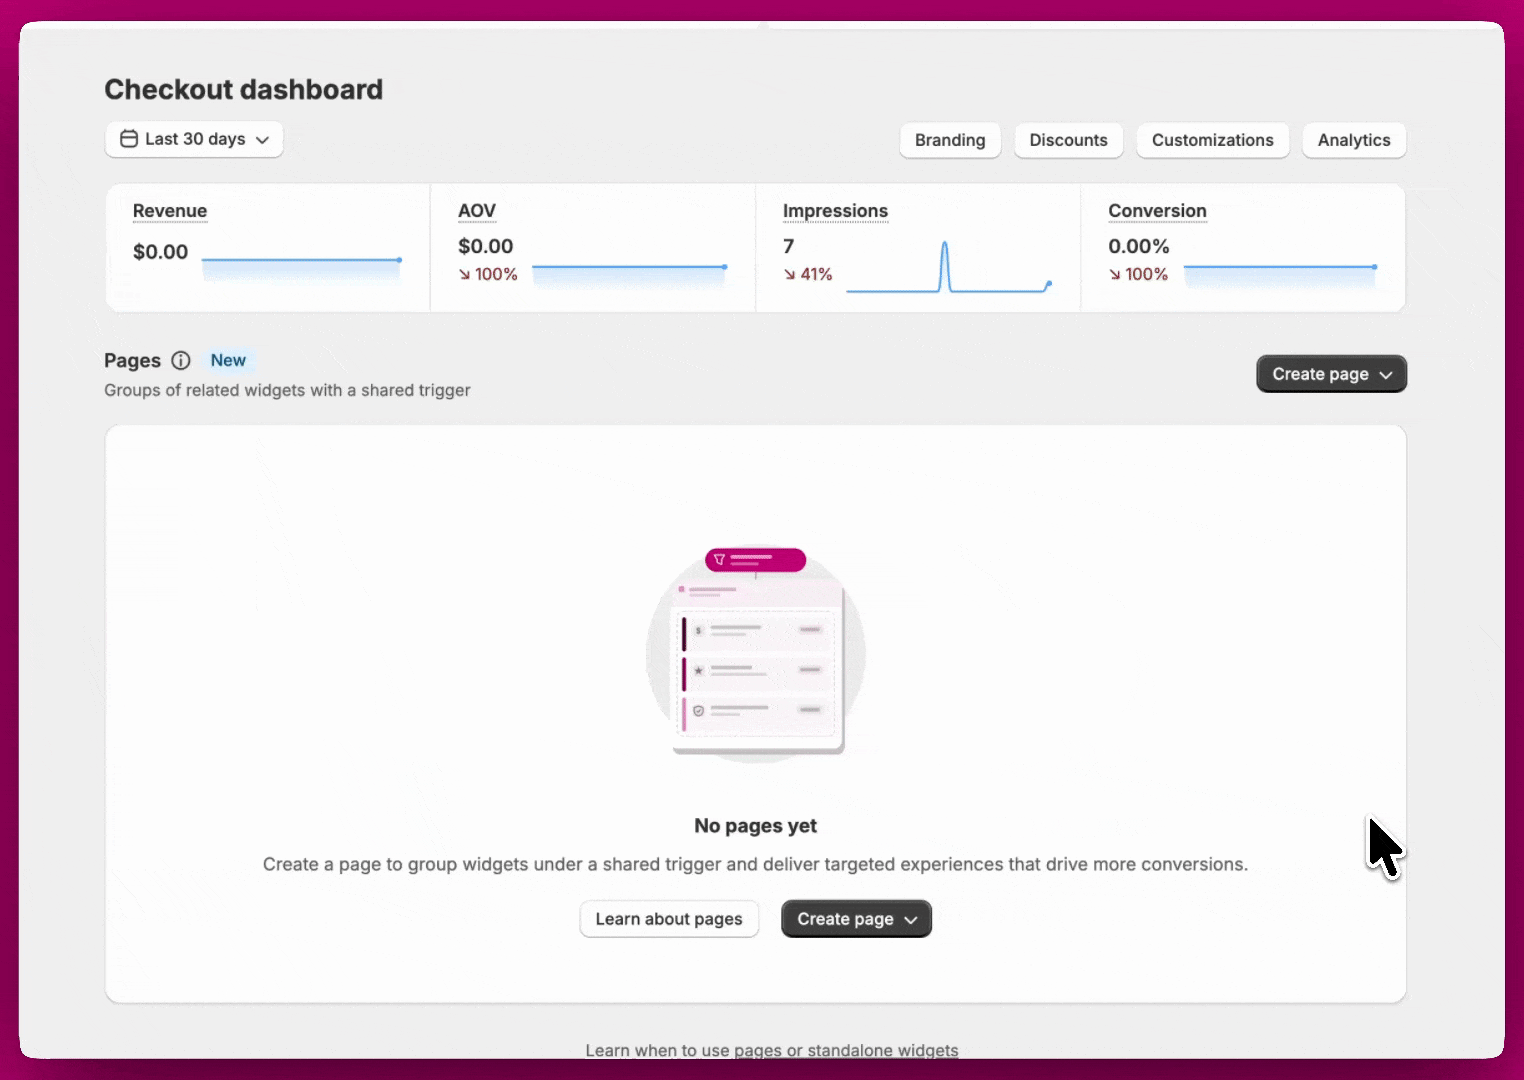
Pages
A Page is a group of widgets that share a single group of triggers. When the trigger conditions are met, all widgets within the page are displayed together. Pages are ideal when you want to show multiple widgets to the same audience at the same time.
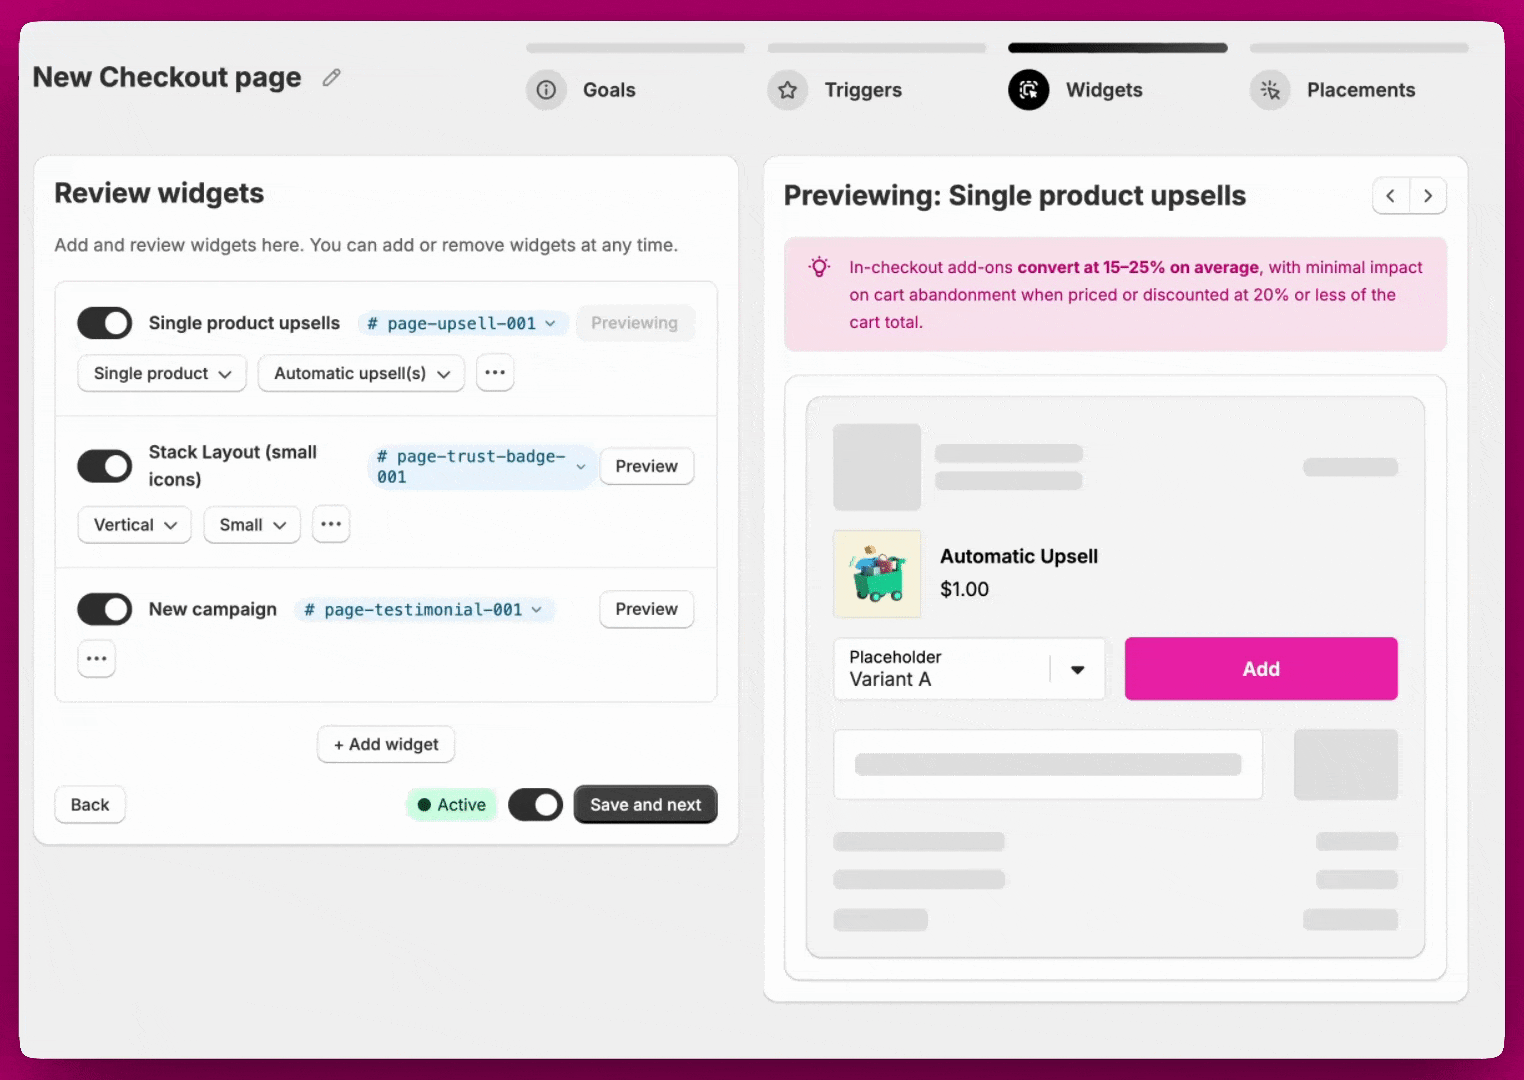
Creating a Page When creating a page, you have two options: Guided setup or Start from scratch. Guided setup The Guided setup walks you through a recommended configuration based on a goal you choose. The setup follows four steps: Goal, Triggers, Widgets, and Placement. Step 1: Goal Choose the goal that best fits what you want to achieve. Each goal comes with a recommended set of widgets pre-configured for you.
Important: Your goal cannot be changed after saving. If you need a different goal, you will need to delete the page and create a new one. However, widgets can be added to or removed from a page at any time. Take a moment to choose the goal that best fits your strategy before proceeding.
Once you’ve selected your goal, click Save and next to continue.
- Note the BlockID assigned to your widget in the Aftersell dashboard.
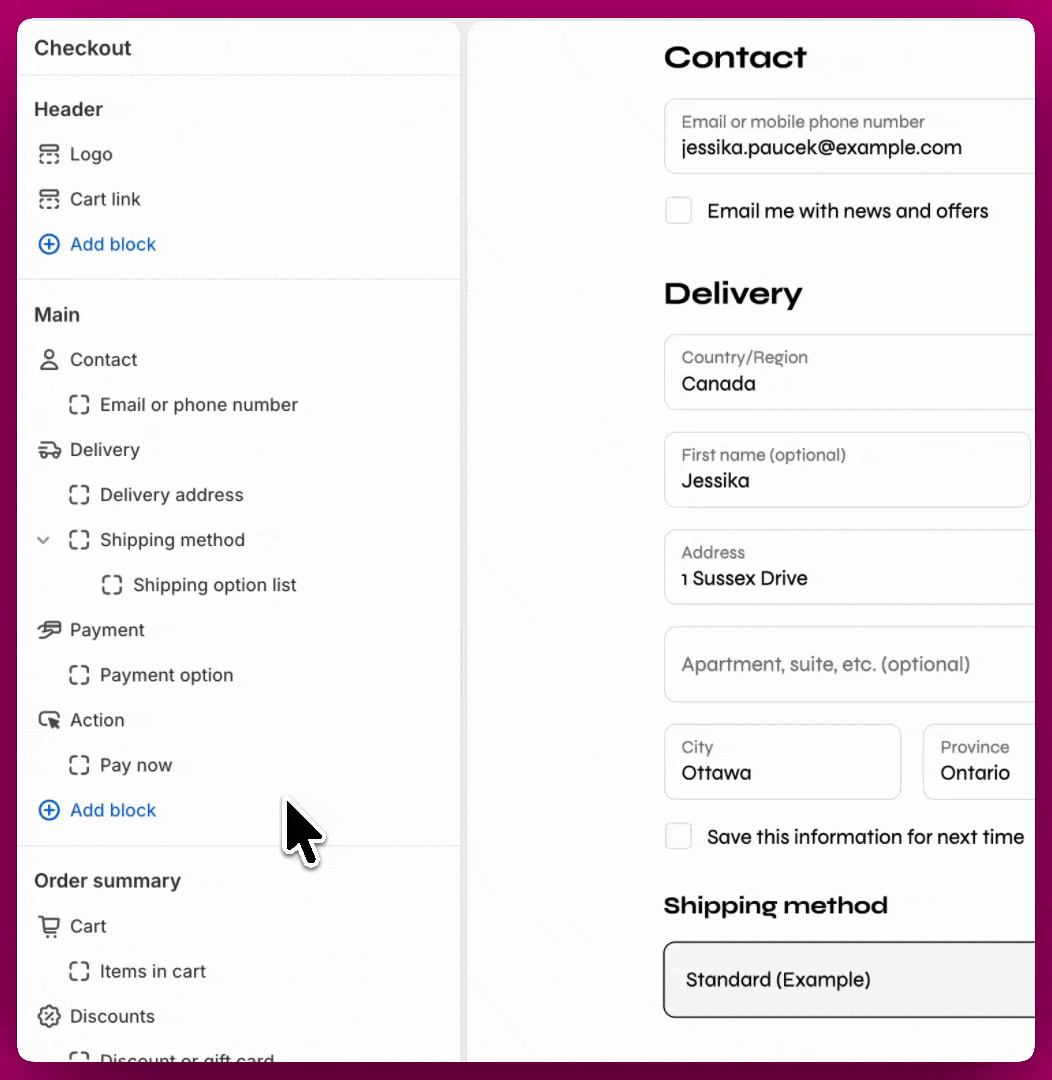
- Open the Shopify Checkout editor.
- Add the Aftersell app block.
- From the dropdown, select the BlockID that matches your widget (e.g., page-upsell-003).
Start from scratch Start from scratch follows the same process as Guided setup, but skips the Goal step. You configure your triggers, add your widgets manually, and then place them in your Shopify Checkout editor using their BlockIDs. Editing a Page You can edit a page at any time after creation, including adding or removing widgets and updating triggers. The only thing that cannot be changed is the goal. If you need to change the goal, delete the page and create a new one. Duplicating a Page To create a copy of an existing page, click the Duplicate icon on the page row in the dashboard. The duplicated page is created in an inactive state with the name prefixed by “(Duplicated)” and includes all the same widgets and trigger configuration as the original. You can rename and activate it when ready.
Standalone widgets
Standalone widgets are individual widgets, each with their own triggers and priority and are best suited for when you only need to display a single widget all the time or to a targeted group of customers.
Creating a Standalone widget Click Create widget from the dashboard. You will be prompted to select two things:- Widget type: The type of widget you want to create (Upsells, Rewards, Trust Badges, Testimonials, Cart Controls, Notes, Text, or Images). For a full breakdown of each widget type and its settings, see Checkout Widget Types.
- Block: Which block to add the widget to. There are three blocks available, and the naming follows the widget type you selected. For example:
- Upsells: Default upsell, Additional upsell 1, Additional upsell 2
- Trust Badges: Default trust badge, Additional trust badge 1, Additional trust badge 2
- And so on for each widget type
Block limit A maximum of 3 blocks can be used for Standalone widgets. Once all 3 blocks are in use, the Add new block option will be unavailable and no additional widgets of the same type can be created until an existing block is removed.
Placement Each Standalone widget must be placed in your Shopify Checkout editor as its own app block. When adding an app block in Shopify, you will see BlockID options for your standalone widgets listed as:- Default placement
- Additional placement 1
- Additional placement 2
- Open the Shopify Checkout editor.
- Add the Aftersell app block in your desired location.
- From the dropdown, select the BlockID that corresponds to your widget.